Thursday, 31 May 2012

: Max Payne 3 PC System Requirements :


Max Payne 3 PC System Specifications:-

LOWEST TESTED SPECS
Windows 7/Vista/XP PC (32 or 64 bit) 
Intel Dual Core 2.4 GHZ or AMD Dual Core 2.6 GHZ, or better 
2GB System RAM 
NVIDIA® GeForce 8600 GT 512MB RAM or AMD Radeon™ HD 3400 512MB RAM

LOW RECOMMENDED SPECS
Windows 7/Vista/XP PC (32 or 64 bit)
 Intel Dual Core 3GHz or AMD equivalent
3GB System RAM 
NVIDIA® GeForce 450 512MB RAM or AMD Radeon™ HD 4870 512MB RAM

HIGH RECOMMENDED SPECS
Windows 7/Vista (32 or 64 bit)
Intel i7 Quad Core 2.8Ghz or AMD equivalent
3GB System RAM
NVIDIA® GeForce 480 1GB RAM or AMD Radeon™ HD 5870 1GB RAM

HIGHEST TESTED SPECS
Windows 7/Vista (64 bit)
Intel i7 3930K 6 Core x 3.06 GHZ or AMD FX8150 8 Core x 3.6 GHZ 
16GB System RAM 
NVIDIA® GeForce® GTX 680 2GB RAMor AMD Radeon™ HD 7970 3GB RAM

OTHER REQUIREMENTS
HDD Space: 35 GB
Sound Card: 100% Direct X 9.0 compatible – Direct X 9.0 compatible supporting Dolby Digital Live

Saturday, 26 May 2012

HOW TO ROOT YOUR ANDROID DEVICE

Today I will tell you how to root your android device easily. This process works in almost all the devices but if your device won't root, then tell me. I will post one dedicated for that phone !!


If you don't know what is rooting , then i would suggest you to read a post in this blog about what rooting is exactly !!

** PLEASE NOT THAT THIS BLOG IS NOT RESPONSIBLE IF YOU ACCIDENTALLY BRICK YOUR PHONE **

** YOU SHOULD DO THESE ONLY IF YOU UNDERSTAND WHAT RISKS ARE INVOLVED** 

Follow These Steps Very carefully One by One

1. Download Superoneclick 2.2 


After downloading extract it anywhere you please. Now go to ur system folder i.e where you have installed your OS (i.e Win xp, win 7 etc) Lets say its in the 'X' Drive. So go to X:/WINDOWS/system32/cmd.exe and copy it, now go to where you installed Superoneclick. Inside the folder there'll be a folder as "ADB" open it and paste the 'cmd.exe' you copied.

2. Download Your Device ADB drivers

You can find these drivers easily by searching in google.com. Go to google and type your model name followed by adb drivers. They should be available for download.
* install the drivers after downloading them *


3. Connect your Device

After installing the Drivers Connect Your Optimus Net using the data cable. In your Device go to settings>Applications>Development>USB Debbuging. Check the box beside it. It will give you a warning just click OK. When you connect your Device you will see 'Turn USB storage on" option DO NOT TURN IT ON. After connecting you will see in the notification bar that "USB Debbuging On" it means you have done evrythng ok uptil now. 

Now before rooting Go to settings>Storage>Unmount SD Card it will ask you if you want to unmount click OK. After it is unmounted you can begin rooting. MAKE SURE YOU UNMOUNT THE SD CARD OTHERWISE IT MAY BE COMPLETELY ERASED.

4. Now Let's Root

Now Go to the ADB folder. Remember the cmd.exe you pasted there? Click on it.

WINDOWS 7 USERS MAKE SURE BEFORE CLICKING CMD YOU RIGHT CLICK AND CLICK ON 'RUN AS ADMINISTRATOR' AND ALLOW

In the commands write the following:- [Give the exact spaces i have given OTHERWISE IT WILL NOT WORK!!]:-

adb devices (press enter)(after this command you should see your device id)
adb shell (press enter) (after this command you should see $ sign)
$ echo 1 >/data/local/lge_adb.conf (press enter)

DO NOT CLOSE THE WINDOW JUST MINIMIZE IT!!

Now go to Where you extracted Superoneclick and click on superoneclick.exe.

In the window on the Top Left hand Side of the window there will be an option 'ROOT'.
CLick on it!
it doesnot come on 3.4+
now i am rebooting my device

note:::[+] Rush did it ! It's a GG, man ![+] Killing ADB and restarting as root... enjoy!
when you get this message reboot your phone so that reboot process completes successfully

THUS YOU HAVE ROOTED YOUR PHONE !!!! NOW ENJOY !!
I WISH TO POST ANOTHER TUTORIAL ON HOW TO INSTALL CUSTOM ROMS IN YOUR ANDROIDS BUT YOU HAVE TO WAIT FOR  IT !!

* * IF YOU RUN INTO ANY PROBLEM JUST LEAVE A COMMENT I'LL WORK ON IT * *
** LEAVE A COMMENT IF YOU HAVE SUCCESSFULLY ROOTED YOUR DEVICE ** 


Monday, 21 May 2012

Change Windows Boot Animation

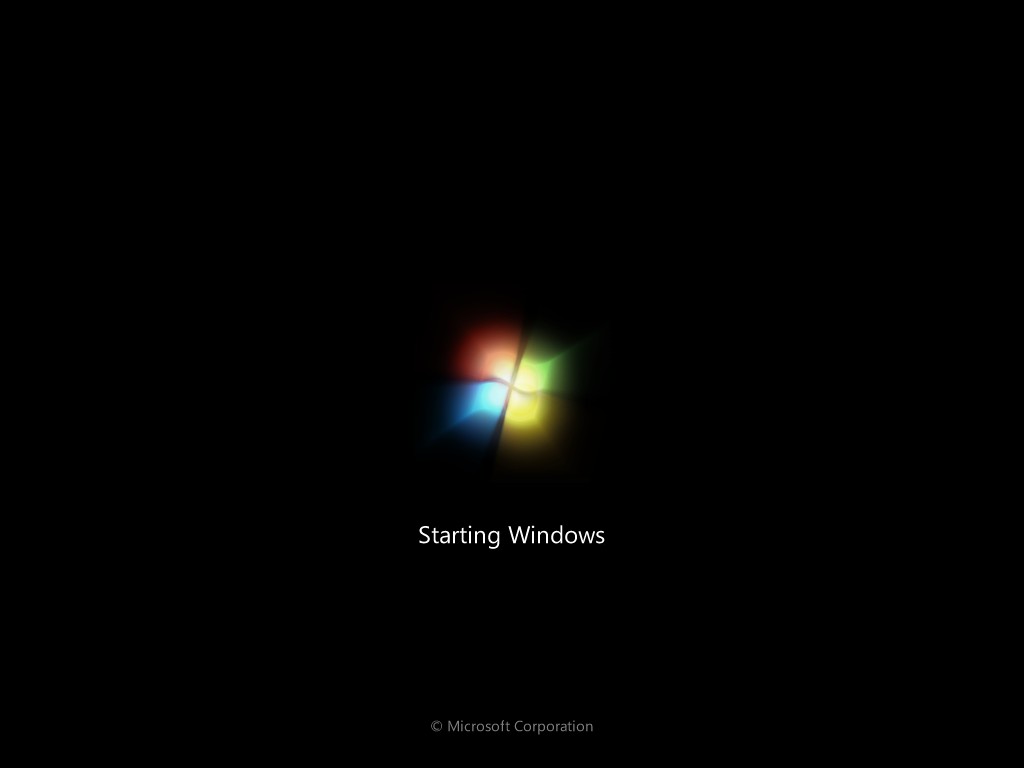
Are you bored with the same windows 7 boot animation where 4 light spheres come and join to make the windows logo ?


Well i was . Then i searched many places to change the boot animation. Then I found a software on the net that can change the boot animation to anything you want. The software's name is Win7bootupdater. This software will change the boot animation very easily. All you have to do is cut a video loop that you want to display during booting. The video must be of maximum 105 frames long. Then output the cut video loop in jpg images in a folder. Then run the program. Select animation from the drop down menu under animation.Then select all the jpg sequential images. And the animation should be loaded. Remember the animation is a loop one and the looping starts from 60th frame. So cut your video accordingly !!! The link to the file :http://www.4shared.com/file/oSZpuJHF/Win7BootUpdater.html?


***If anyone wants a cool boot animation but cannot make one request me in the comment.. i will make one for you and upload it here !!! Have fun !!! ***

WHAT IS ROOTING YOUR ANDROID MOBILE


“What is rooting? Why should I root my Android device?” These are common questions that I get asked quite often. Today’s lesson is to talk to you about both the advantages and disadvantages of rooting your Android devices. But before we get started, a word of caution: rooting or modifying your phone in any way will void your manufacturer’s warranty and possibly “brick” it. What does “bricking” your device mean you ask? Exactly what you think… It means screwing up your phone software so badly that your phone can no longer function properly and is pretty much as useless as a brick. I do not in any way recommend anyone to root their Android device. This article is simply to introduce you to the subject of rooting and present you with both the pro’s and con’s so that you can make an educated decision on your own.
What is Rooting?
“Rooting” your device means obtaining “superuser” rights and permissions to your Android’s software. With these elevated user privileges, you gain the ability to load custom software (ROM’s), install custom themes, increase performance, increase battery life, and the ability to install software that would otherwise cost extra money (ex: WiFi tethering). Rooting is essentially “hacking” your Android device. In the iPhone world, this would be the equivalent to “Jailbreaking” your phone.
Why is it called Rooting?
The term “root” comes from the Unix/Linux world and is used to describe a user who has “superuser” rights or permissions to all the files and programs in the software OS (Operating System). The root user, because they have “superuser” privileges, can essentially change or modify any of the software code on the device. You see, your phone manufacturer/carrier only gives you “guest” privileges when you purchase your device. They do this for good reason… they don’t want you getting into certain parts of the software on your phone and screwing it up beyond repair. It makes it much easier for them to manage and update the devices if they lock it all down. This way, all the users are running the same unmodified version of the phone’s software. This makes it much easier for them to support the devices. But, for the tech-savvy crowd, only having “guest” privileges on your device is pretty lame and it locks down a lot of potentially useful features.

What are the Advantages of Rooting?

Custom Software (ROM’s)
You may have heard of people loading custom “ROM’s” on their devices. A “ROM” is the software that runs your device. It is stored in the “Read Only Memory” of your device. There are many great custom ROM’s available that can make your Android device look and perform drastically different. For instance, you might be stuck with an older Android device that is stuck on an older version of the Android OS and it is not getting any of the newer updated versions of Android. With a custom ROM, you could load up the latest and greatest available Android versions and bring that antiquated device up to par with some of the newer ones. There are lots of great ROM’s available for many different phones and it is up to you to find the one that best meets your needs. The best place that I have found to find custom ROM’s for Android devices is the XDA Developers Forums. The XDA community is filled with smartphone enthusiasts and developers for the Android platform. Check them out and see if you find any ROM’s that would meet your needs. [Link Here]
Custom Themes
Themes are basically the graphics that appear on your Android device. Rooting your device allows you the ability to fully customize just about every graphic on your device. You can load custom themes that totally change the look and feel of your device. Here are some examples:http://forum.xda-developers.com/forumdisplay.php?f=527
Kernel, speed, and battery
There are many custom ROM’s and apps available for rooted devices that will allow you to drastically improve the performance (speed) and also extend battery life on your device. A lot of developers tweak the kernels (layer of code that handles communication between the hardware and software) for added performance, battery life, and more.
Baseband
Rooting your device grants you the ability to update the Basebands on your smartphone. The Baseband is what controls the radio on your device. By updating to the latest Basebands, you can potentially improve both the signal and quality of your phone calls.
Latest Versions of Android
As mentioned earlier, custom ROM’s can allow you to update to thelatest version of the Android OS before they are officially released. This is a great feature for those who are tech-savvy and want to stay on top of the latest and greatest software updates before it hits the mainstream crowd. This is also useful if you have an outdated device that is no longer being updated by the manufacturer.
Backing up your device
The ability to easily backup all of your Apps and Data is one feature that is sorely missed on the stock build of Android devices. But if you root your device, backing up everything on your device (both apps and data) becomes a simple task. Titanium Backup is a must have app for anyone who has rooted their devices and wants to backup and restore their phones. [Market Link]
Unlocking Additional Features
By rooting your Android device you also gain the ability to unlock some features that your carrier may charge for. One example is enabling free WiFi and USB tethering, which many carriers charge money for. Now, I’m not suggesting you do this. But I did want to make you aware of the fact that it is possible to do this. However, your carrier may catch on to the fact that you are using your device as a free WiFi hotspot and figure out a way to charge you for it. So use this feature at your own risk!

WHAT ARE    THE    DISADVANTAGES     OF    ROOTING

Bricking
The number one reason not to root your device is the potential risk of “bricking” it. As mentioned earlier, “bricking” your device means screwing up your phone software so badly that your phone can no longer function properly and is pretty much as useless as a brick. You would likely need to purchase a new Android device since the manufacturer of your device will void the warranty after any attempts at rooting.
Security
There is an increased risk of unknowingly installing malicious software when you root an Android device. Root access circumvents the security restrictions that are put in place by the Android OS. There isn’t really an effective way to tell just what the application intends to do with that “superuser” power. You are putting a lot of trust into the developer’s hands. In most cases, these applications are open source and the community can take a look at the source code to assess the risk. But, nevertheless, the risk is there. Fortunately, malicious software on rooted devices hasn’t really been a problem as of yet. But I thought it was worth mentioning since this could be a potential risk in the future. I’d recommend installing an Anti-Virus and Security App just to be safe. Lookout Mobile Security seems to be one of the best ones available at the moment. [Link Here]
Can I Unroot my device if I change my mind?
Yes. You would need to do some research for your specific type of device. As mentioned earlier, the XDA Developer Forums is the best place to start. [Link Here]
How do I learn how to root my device?
Unfortunately, there is no easy way to teach someone how to root their Android device. Each device has a unique method to rooting and some research most be done on your part. As I mentioned earlier, the best place to start would be the XDA Developer Forums. [Link Here]  Another option is to simply Google your model phone and the term root (ex. “HTC EVO root”). Have fun and good luck to all of you! I hope you found this lesson on rooting to be helpful. If you have any questions, please feel free to leave a comment below.

Friday, 18 May 2012

iPhone DFU Mode Explained & How To Enter & Exit From it

What is iPhone DFU mode?

DFU mode is a state that you can put your iPhone into where it can interface with iTunes but does not load the iPhone operating system or boot loader (this is what really differs DFU mode from recovery mode). DFU stands for Device Firmware Update.

What is DFU mode used for?

The primary reason people need to access DFU mode on their iPhone is to change the firmware on the device. This can serve to downgrade to a prior iPhone firmware and operating system, or to use a custom firmware that is required for a jailbreak or SIM unlock. For instance, if you got the iPhone OS 4 download installed and decided you would rather have a prior version of the firmware on your iPhone, you would need to do this through DFU mode.

How to enter iPhone DFU mode:-

  • Connect the iPhone to your computer and launch iTunes
  • Turn the iPhone off (hold down the power button at the top of the iPhone)
 
  • Hold down the sleep/power button and home button together for exactly 10 seconds, then release the power button
  • Continue to hold down the Home button until a message appears in iTunes telling you an iPhone in recover mode has been detected

  • When you are in DFU mode your iPhone screen will be completely black

iphone dfu mode
Even though the screen is black, that doesn’t mean the device can’t be interfaced with either iTunes or a custom firmware client (for jailbreaking, etc).
Remember that if you see the restore logo, iTunes logo, or any message on the iPhone screen, you are not in DFU mode but standard Recovery Mode. Again, DFU mode is signified by having a completely black screen on the device. If anything else is the case, repeat the steps above until you enter into DFU mode successfully.

Exit DFU mode on iPhone:-

The simplest way to exit out of DFU mode is to hold down the Home and sleep/power buttons on the iPhone while connected to iTunes. Then just hit the power button as and this should reboot the device as usual.
And if you’re curious, yes this works all the same on an iPod touch.
The most common use for DFU mode is to jailbreak. It’s not unusual for people to buy an existing iPhone and jailbreak the device to use the phone on another network or overseas, this is often a cheaper way to get an iPhone than to sign into a contract with AT&T, pay roaming charges, or pay the full iPhone 4 price.

How to Create a CON folder in Windows??

Can you create a folder named “con”, “prn”, “nul” “com1″ “com2″ “lpt1″ etc. in windows ?
The answer is NO and YES!

NO because when create a new folder and try to rename it to any one of the above specified names, you know what happens! In Windows XP the folder name automatically changes back to “New Folder” no matter you try any number of times. Where as in Windows Vista/7 when you try to rename the file you get an error message “The specified device name is invalid”.
What is the reason for this? Simple, these names represent the internal devices and hence we cannot create folders with the above names.
 
YES because it is still possible to create these folders using the command prompt. Here’s the instructions to create it.
 
1. Go to command prompt

2. Type in prompt (FOR EG. TO CREATE CON FOLDER IN E: DRIVE) C:\>md \\.\e:\con (NOTE: “con” can be replaced by any other names such as “prn”, “nul” “com1″ “com2″ “lpt1″ etc.)


3. To delete the folder use the following command C:\>rd \\.\e:\con (NOTE: The folder can only be deleted from the command prompt.You cannot remove it by right-click delete.)


How To Use Windows 7 For 1 Year Without Activation

Most of you might be aware of the fact that it is possible to use Windows 7 for 120 days without activation. This is actually possible using the "slmgr -rearm" command which will extend the grace period from 30 days to 120 days.

Now, today I'll show you a small registry trick to  use Windows 7 for almost 1 year..!!

Step-1. Goto “Start Menu -> All Programs -> Accessories“.
Right click on “Command Prompt” and select “Run as Administrator“ (If you are not the administrator then you are prompted to enter the password, or else you can proceed to step-2)
 
Step-2. Now type the slmgr -rearm command and hit enter.

Step-3. You will be prompted to restart the computer. Once restarted the trial period will be once again reset to 30 days. You can use the above command for up to 3 times by which you can extend the trial period to 120 days without activation.
 
Step-4. Now comes the actual trick by which you can extend the trial period for another 240 days. Open Registry Editor (type regedit in “Run” and hit Enter) and navigate to the following location: HKEY_LOCAL_MACHINE\SOFTWARE\Microsoft\Windows NT\CurrentVersion\SoftwareProtectionPlatform

Step-5. In right-side pane, change value of SkipRearm to 1.
 
Step-6. Now you will be able to use the slmgr -rearm command for another 8 times so that you can skip activation process for another 240 days. So you will get 120 + 240 = 360 days of free Windows 7 usage.